Happy Thursday, everyone! I’m so glad the weekend is right around the corner. I have an exciting weekend planned with my brother; a little mini vacation to Colorado. Since, I won’t be around this weekend, I wanted to post another summer time manicure.
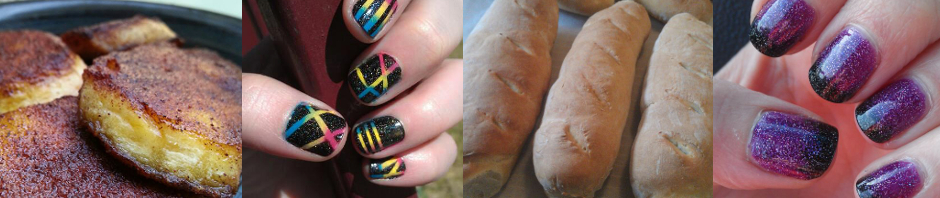
Neon Gradient Stripes!

For this manicure, you will make your gradient first. After you put a base coat on, you can opt to put a base color of white to make the gradient colors pop more. I did not use a base color of white. To make your gradient, use a makeup sponge. Make sure you overlap your colors. You can use any colors, but I went for more of neon type colors. Make the gradient on each nail. By the time you are done with both hands, your first hand should be ready for the second coat. Sometimes gradients can take up to 3 coats to make the gradient seamless.
The fun thing about this manicure is, each finger can look different from the other. Put your gradient in different directions. Or put the order of the colors differently each time. You can get very creative with this.
Now, you need to let your gradient to dry completely. If you want, you can use a fast drying top coat to speed up the drying process, and it will also blend your gradient.
You will need to use nail art striping tape or cut out thing strips of tape. I used 3 per nail. You can use as much tape as you want. Again, this is where you can get creative. Place the tape in different directions. Make designs. Cut your tape into different widths. It’s all up to you!
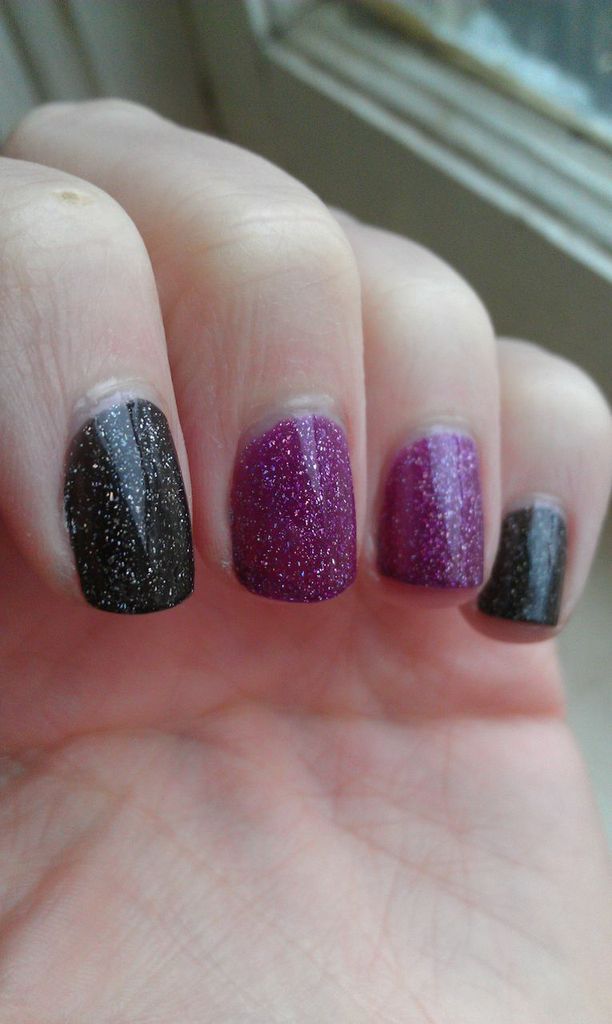
Once your gradient is dry, put on a color of choice. You don’t have to use black. Use anything you want. I used Zoya’s “Storm.” I’m obsessed with this polish. I just love the micro holographic glitter in this. So beautiful. Click the pictures to see it in all its glory

Once you painted your nail with the color of your choice, immediately take the tape off. I paint one nail at a time and remove the tape. After all your nails are done, put on a fast drying top coat, and you’re done! Such a neat effect. It looks much more complicated than it is.
If you try this design out post it on instagram! Tag me at #noodmood.


